Dialer Export
From the
main screen of CollectMax, click the  button to display
the Network Processes Screen.
button to display
the Network Processes Screen.
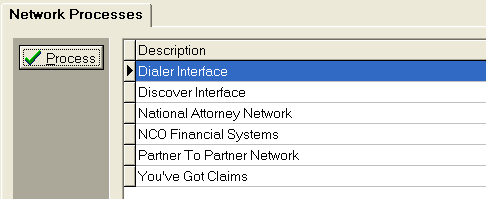
Select the
Dialer Interface and click the  button.
Users
may also double click on the Interface Name.
The Dialer
Export Screen will be displayed.
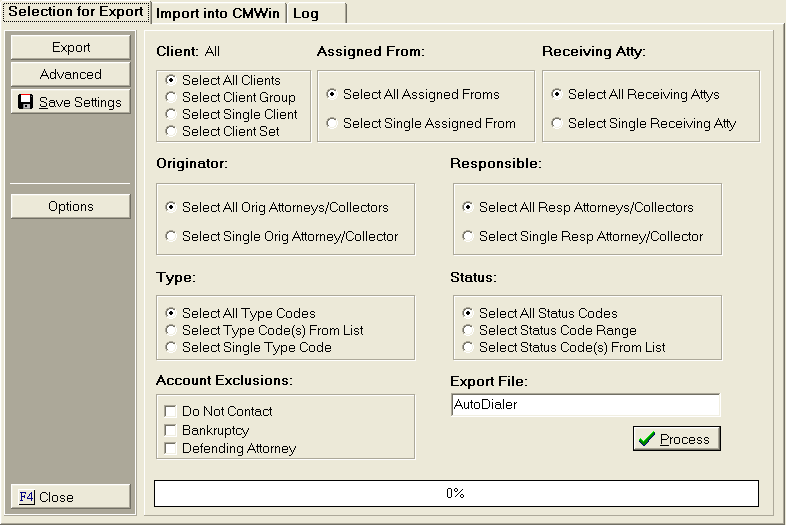
Before exporting
a file, setup the Dialer Export Options.
Once the
options have been set, users can narrow the selection of accounts down
by the following criteria:
- Client: Select
All Clients, A Client
Group, A Single Client or a Client Set.
- Assigned From: Select
All Assigned From or a Single
Assigned From Code.
- Receiving Attorney: Select All
Receiving Attorneys or a Single
Receiving Attorney.
- Originator: Select
All Originators or A
Single Originator.
- Responsible: Select
All Responsible Attorney/Collectors
or a Single Responsible Attorney/Collector.
- Type: Select
All Type Codes, Type
Codes from a List or a Single Type Code.
- Status: Select
All Status Codes, A Status Code Range or Status
Codes from a List.
- Account Exclusions: Exclude
accounts that have a Do Not Contact
assigned, or are Bankrupt or have
a Defending Attorney Assigned.
- Select
the Export Name (File Name). The
will default to Auto Dialer. Users
can change the name of the export file name. It
is recommended that user select a unique name each time.
For Example: Autodialer01012006
For Advanced Selection Criteria, click the
 button to display the Dialer Advanced Options Screen.
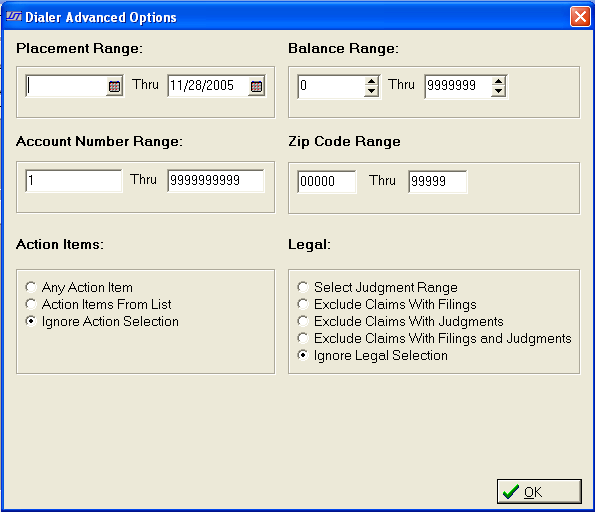
User can
continue to narrow down the accounts to be selected for the export file
from the following advanced selection criteria.
- Placement Date Range: Enter
the placement date range of the account to be included in the export file.
The placement
date is the date the account was placed/opened with the firm.
- Balance Range: Enter
the balance range of the accounts to be included in the export file. Accounts
outside the balance range will not be included in the export file.
- Account Number Range: Enter
the range of accounts numbers to be included in the export file. Accounts
outside the account number range will be excluded from the export file.
- Zip Code Range: Enter
the range of zip codes to be included in the export files. Accounts
with zip codes outside of this range will be excluded for the export file.
- Action Items:
Select
to narrow the selection criteria by action
items.
- Legal: See
Legal.
After selecting
the advanced options click the  button to exit the screen.
- Click
button. Select
to print
the export report to Screen (recommended),
Printer or File.
Note: The report is a summary of the accounts in the file. Do not print the report to file and send the file to your dialer service. Instead, send the file that the process creates in the export directory.