
This feature allows you to design predefined scripts with merge variables for your staff to use when communicating with debtors. The script, the date, elapsed time and the operator will be saved for easy access on the account.
Note: This is a Version 8 Feature. For information on obtaining this or any other feature, please contact the Sales Department
To setup a script, click Definitions > Account Scripts > Script Editor.
Click the New button on the left, and this will bring up a blank script.
![]()
Give your script a Code and Description. The code can be up to 10 characters in length and cannot be changed after the script has been saved.
Hint: You can use the Groups function to organize your scripts. For instance, suppose you have settlement scripts that vary be client, state, etc. You can create a Settlement Group, and have all of your settlement scripts reside in that group for easier access.
If you would like your script to be a part of a group, select your group in the drop down menu. (More on creating Group codes here.)
Hint: If the script is used often, a keyboard shortcut would help the users to bring it up quickly while on the phone. To do this, select a Hot Key from the drop down list.
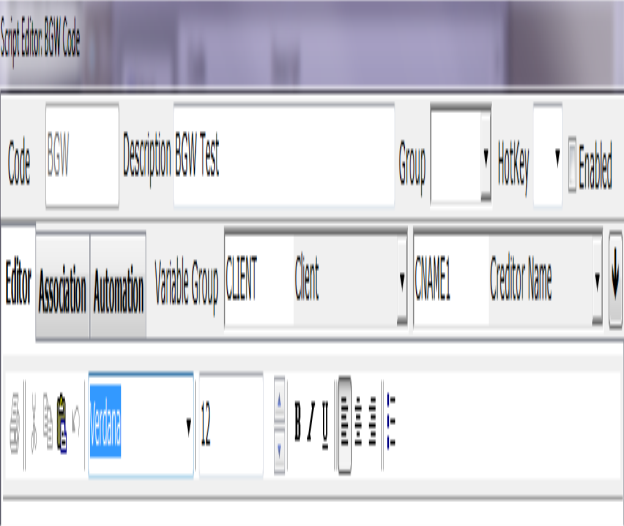
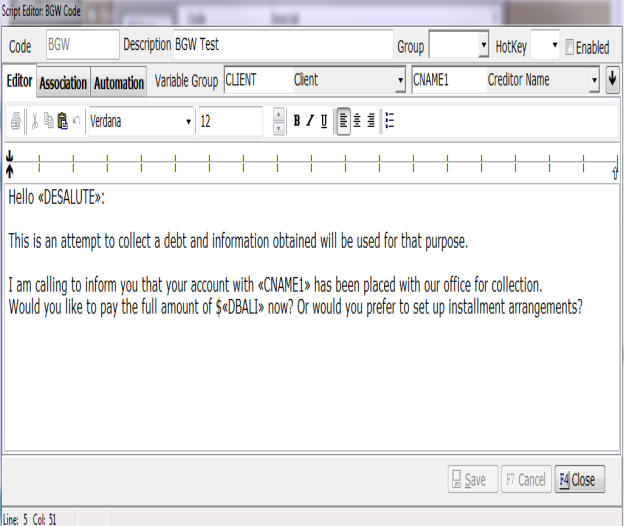
One of the first things you’ll notice in the Editor tab is there are many tools available that are similar in appearance and functionality as most word processing applications. You can also see that there are two drop down menus for adding fields to your scripts. Much like in your documents in CollectMax, the first menu lets you pick what the variable group and the second lets you pick the actual field from the aforementioned group. For example, suppose you would like to add the creditor name to your script. Pick Client from the Variable Group menu, followed by the field CNAME1. After that, click the down arrow on the right.
Checking the Enabled box will make the script accessible to users.
Hint: This is useful for situations where you may be awaiting approval on either on a new script or a replacement for an existing one.
On this tab, you can choose to attach your script to a client or user.
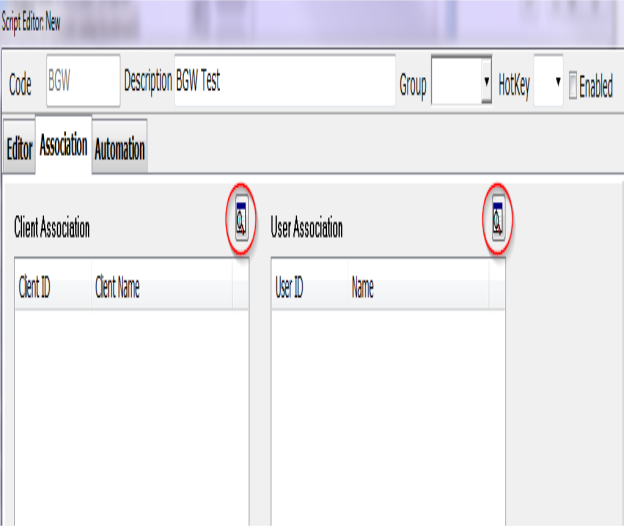
By clicking the Detail button for the Client, you can assign your script to individual clients, client groups, or client sets. Use the “>” or “<” buttons to select individual items. Use the “>>” or “<<” buttons to select all items.

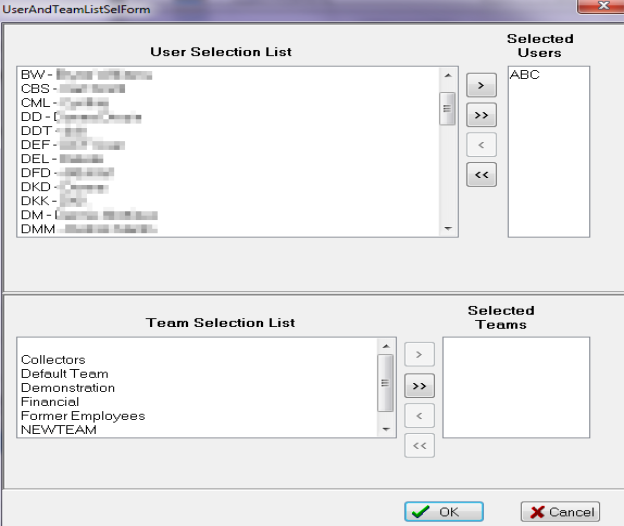
By clicking the Detail button for the User, you can assign your script to individual users or team. Use the “>” or “<” buttons to select individual items. Use the “>>” or “<<” buttons to select all items.
Note: By using Association, only the client(s) or user(s) selected will have access to the script. If you would like the script to be available for All Clients and/or Users, either do not use Association or move all clients/users to the selected list.

Here you have the option to save your script as an image when read. If checked, just pick the image type you would like to attach from the drop down menu and give it a description. Then when your script is opened on the debtor account, it will be saved in the debtor’s images.
Note: In order to save scripts as an image, you must have the Document Management module. For information on obtaining this or any other feature, please contact the Sales Department
To create a Group Code, go to Definitions > Account Scripts > Group Codes.
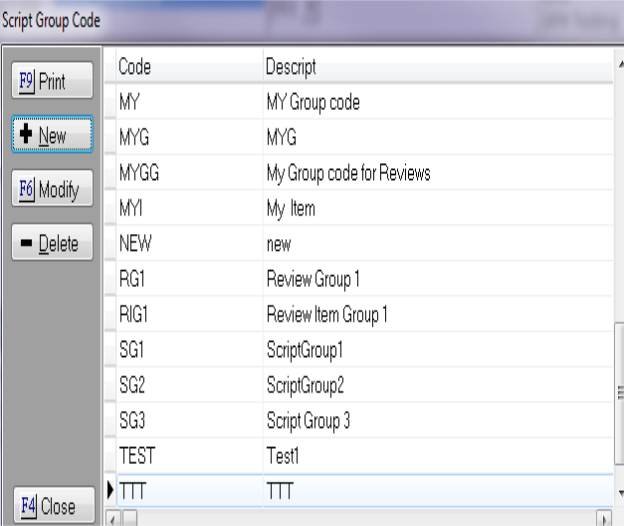
From here, click the New button.

Add your code and description. Then click Save.
Your new group code will be available to use when adding or modifying a new script.
From the left menu, click the Scripts button or press Ctrl+Alt+S to display the script fly out menu.

Type the Hot Key to display the Script. If there is no hot key associated, you can select it from the menu of recent scripts (they will be listed above “History”) or click the “More…” option.

Upon clicking the “More” option, you will see the two drop down menus. From the top drop down menu, select your group (if any) or choose ALL SCRIPTS. In the lower drop down menu, select your script and click the Start button.
Note: If you do not see your script in the drop down list, the “Enabled” option on the script itself may not be checked.
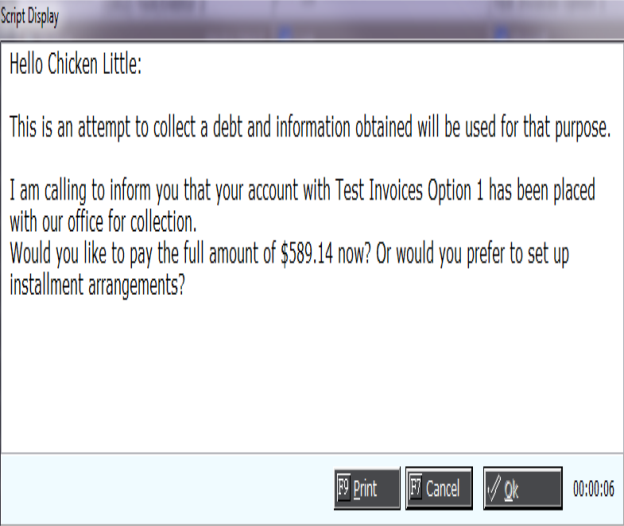
Once the script has been open for 10 seconds, the OK button will become enabled. After you click the OK button, the window will close and there will be a history entry indicating that the script was read to the debtor. You can also choose to print the script from this screen.

You can view any scripts that were previously used on an account. Click the Scripts button on the left, then select History in the fly out menu.
This will bring up a table of any previously read scripts.

The View button will bring up that particular script as it was read at the time, which you can also print. So any fields that may have changed (balance, address, etc.) will not be reflected when viewing historical scripts.