 .
.This new feature will allow you to add complaints/disputes for the Consumer.
1. From the “Main Menu,” select the .
2. Select your “Consumer/Debtor” by using any of our “Find by” options. The Consumer Debtor screen will pull up.
A new Complaint button has been added to the “Consumer/Debtor” screen. It will allow you to log and track any complaints or disputes from the Consumer. All complaints will be in “Bold Print.”

The new feature allows all complaints and disputes to be contained in one designated area. Which provides for a quick look up of information and the data can also be exported to Excel. We also added a feature that will allow you to track all events concerning your complaints and disputes. The “EVENTS” section is located on the bottom of this new screen.
![]()
A new report called “Complaint Tracking” has been added to allow you to track all complaints and disputes in CollectMax. The report provides quick access and management of all complaints and disputes in your CollectMax system. The report exports all the data to Excel.
![]()
1. Once your selected “Consumer Debtor” pulls up, click the  button found on your left.
![]()
2. Then select the  button to fill out the screen.
3. To enter the “Consumers” information, click the  button and the following screen will appear:
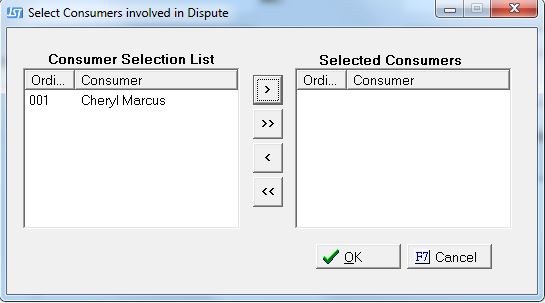
4. Then highlight the Consumer Debtor under the “Consumer Selection List” column and use the  to move the name to the “Selected Consumers” column.
5. Then click the  button.
6. To enter the “Claims” information, click the button.
7. Then select the Claim under the “Claim Selection List” column and use the to move the claim to the “Selected Claims” column.
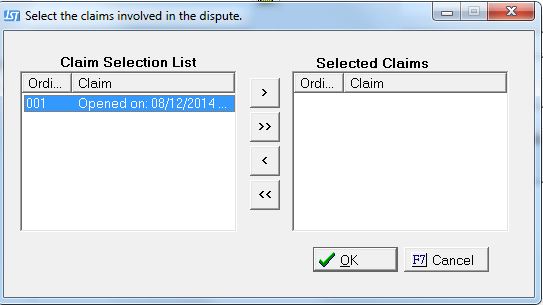
8. Then click the button.
9. To enter the “Type” use the  button. The following options are “Displeasure with Client,” “Displeasure with Law Firm,” “Displeasure with Original Client,” “Demands Validation”, and “Other”.
10. Highlight your option to select.
11. To enter the “Status” use the button. The following options are “Dispute Closed,” “Investigating,” “Dispute Opened”, and “Other”.
12. Highlight your option to select.
13. To enter the “Responsible” use the button. Highlight your option to select.
14. To enter the “Origination” use the button. The following options are “Letter From Third Party,” “Letter From Debtor,” “Other,” “Phone Call From Third Party”, and “Phone Call From Debtor.”
15. Highlight your option to select.
16. To enter the “Open Date” or “Close Date” use this button  .
.
17. To enter the “Nature” use the button. The following options are “Attitude or Inappropriate Behavior,” “Other,” “Technology Issue Reported,” “Violation of FDCPA”, and “Violation of State Statutes.”
18. Highlight your option to select.
19. To enter the “Phone Number” use the button. Then mark the appropriate radio button, “Outbound” or “Inbound”.
20. To enter the “Cause” use the button. The following options are “Other,” “Verbal”, and “Written”.
21. Highlight your option to select.
22. Enter any “Notes” in the open section.

23. After verifying the information entered, click the  button.
Things to Remember: All Complaints/Disputes can be Modified, Deleted, or Printed. If you are printing from the account, you can select “All” or a “Selected” complaint or dispute.The output file will be exported to Excel.
24. Then click  button to close.
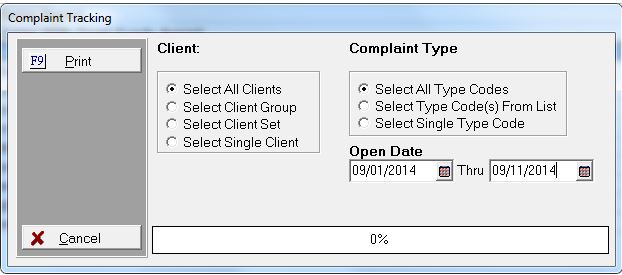
1. Go to the “Main Menu” and select  .
.
2. Then select “Lists” tab.
![]()
3. Select “Complaint Tracking” and select enter.
4. The screen below will pull up:
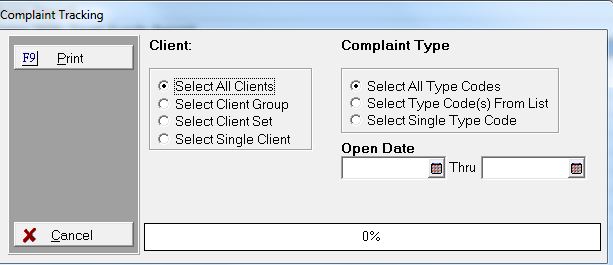
5. Select your options.
6. Select the button.
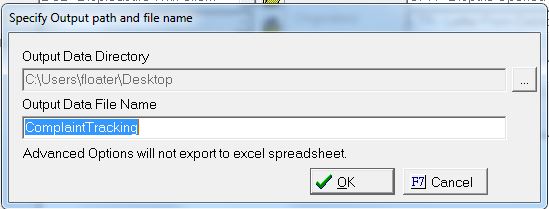
7. It will show you the default location of the file. If you wish to change the location, it needs to be done at this time. Then click the button.
8. To return to the main menu, click the button.
Things to Remember: This report will not export Advanced options to the Excel spreadsheet.