The Case Style feature allows users to set up several different Case Styles that can be attached as a header to documents or court forms. This helps eliminate the need to setup several different documents for different courts due to the differing Case Styles.
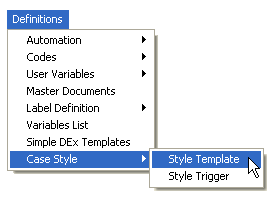
From the menu bar, Click Definitions, Case Style, Case Style Template
to display the Case Style Template Screen.
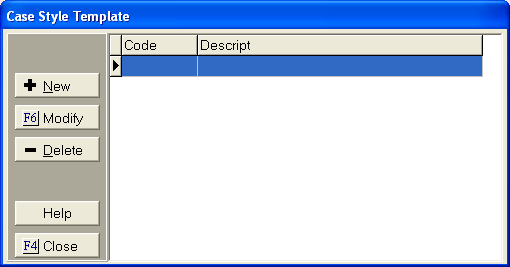
Click the
 button to display the Add a Case Style Template Edit
Screen.
button to display the Add a Case Style Template Edit
Screen.
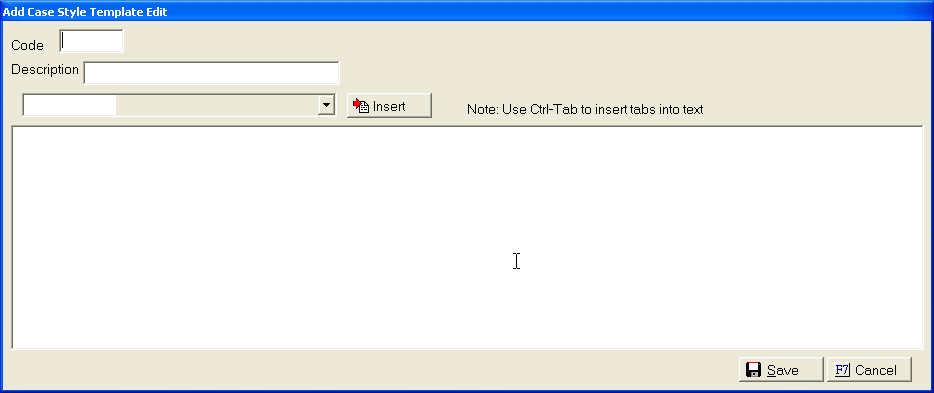
In the large
field, type in the case style. Insert
variables from the ![]() list where needed. The
Case Style should be entered as it would look on the document.
list where needed. The
Case Style should be entered as it would look on the document.
Click the
 button.
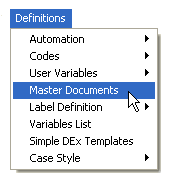
From the menu bar, select Definitions, Master Document
to display the Master Document Screen
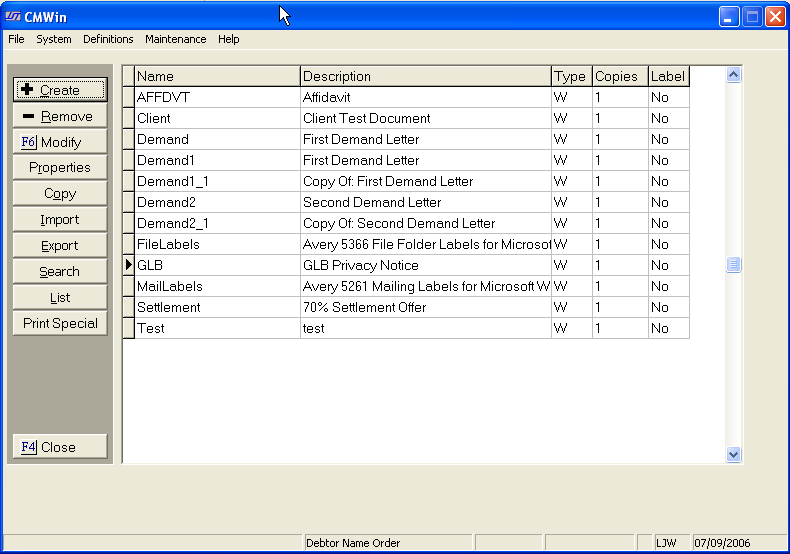
Click on the name of the document that should have a Case Style to select it.
Note: The Case Style will be added as a header on the document. Documents may need adjustments made to add more of less space between the Case Style and the document.
Click the
 button to display the Document Properties Screen.
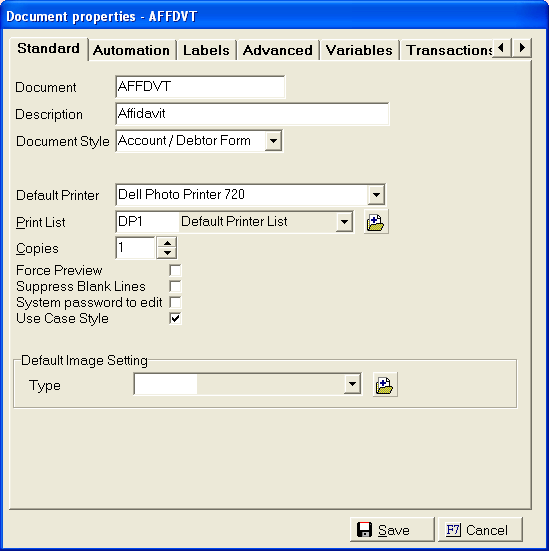
Click the
![]() box next to Use Case Style.
box next to Use Case Style.
Click the
 button to add the Case Style to this Document.
Each time this document is printed the case style selected for the account will be printed as a header.
On a Debtor's
Account, click the  button to display the Litigation Screen.
Click the
![]() button to display the Case Style Screen.
button to display the Case Style Screen.
Note: If using a Case Style Trigger, you will not have to manually set the Case Style using these instructions unless the trigger should be overridden.
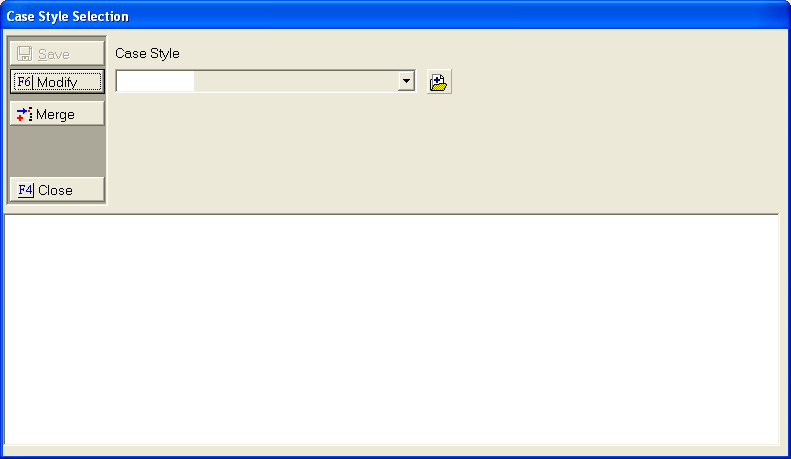
Select the
Case Style from the ![]() list. Click
the button.
list. Click
the button.
If the data
fields in the Case Style should not change even if the data is change
in CollectMax, click the ![]() button. If
debtor's account changes, the Case Style will not. This
includes Client and Debtor Names.
button. If
debtor's account changes, the Case Style will not. This
includes Client and Debtor Names.
Once the
Case Style is saved the Case Style Triggers will not work on this account.
If
the Case Style needs to be changed click the  button make
the changes and save.
button make
the changes and save.
Note: This feature requires the optional Conditional Documents Module and Version 4.
The Case Style Triggers feature allows users to set condition statements that will assign the Case Style used for selected documents for each debtor account. The Triggers can be overridden by manually adding a Case Style at the debtor level.
Note: Because of the complexity of the trigger statements, JST recommends contacting the Technical Support Department for instruction.
From the menu bar, Click Definitions, Case Style, Case Style Trigger
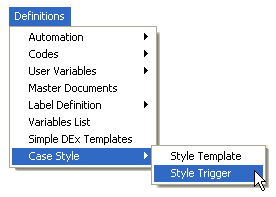
to display the Case Style Trigger Screen.
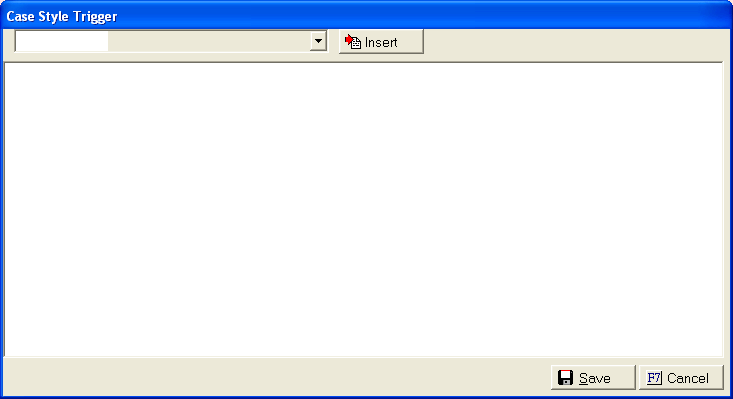
In the box, enter the IF/THEN condition statements to define the Case Style that should be automatically assigned to an account.
All statements
should begin with IF and be followed the qualifying conditions. The
object of the conditions are to narrow down the accounts that will be
eligible for the case style. Conditions
can be typed or picked from the ![]() list of variables at
the top of the screen.
list of variables at
the top of the screen.
After the condition variable, a statement operator symbol must be added followed by a qualifying value to create a condition statement.
Common Statement Operator Symbols:
< Less Than
> Greater Than
<> Not Equal To
= Equal To
<= Less Than or Equal To
>= Greater Than or Equal To
If more than one condition must exist to use a specific Case Style a conjunction must be entered between each condition statement.
Conjuntions:
And
Or
After all condition statements, the results statement must be entered on the next line. The results statement must be entered as <space> <space> THEN RESULT: = CASESTYLE('***') with the *** being the Case Style Template Code.
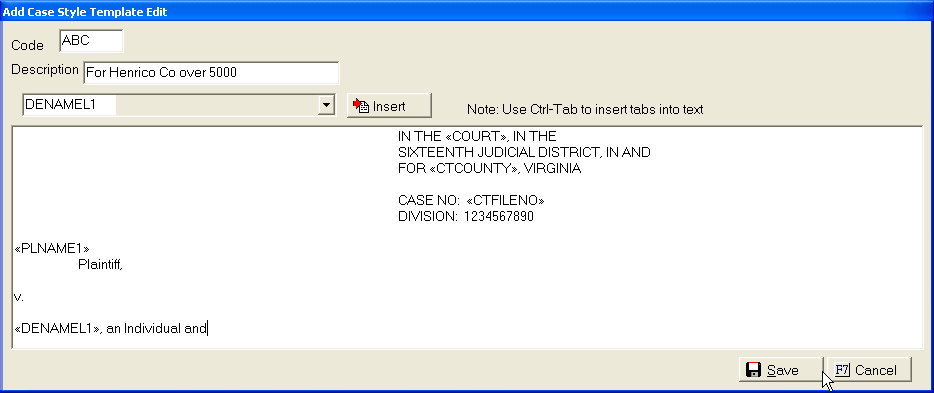
For Example: Any accounts that have a balance of $5,000 or above and the county of Henrico, the case style should be ABC.
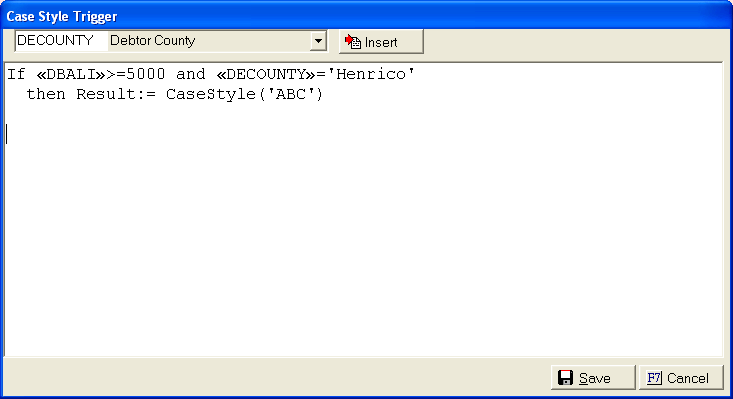
Hint: Balance variables do not need '' around the qualifier but the name and code variables do.
Between each complete statement and before the if of the next statement the word ELSE must be added.
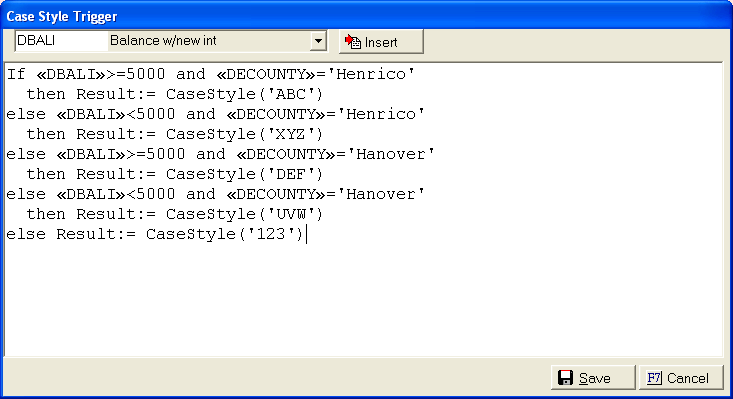
Continue to enter condition statements they have all been entered.
A final result statement must be entered in case an account does not meet any condition statements. See the last line in the above example.
Click the
button.
This is a Version 4 Feature. For information on obtaining this or another feature, please contact the Sales Department.