 button to display the Network Processes Screen.
 The Account Import Module allows you to import new accounts from simple data files sent by your client. The interface allows you to receive different file formats: Excel, comma delimited, tab delimited and pipe delimited.
The import process requires that each data file have unique reference numbers within the data file. If the file contains accounts with duplicate reference numbers, the process will not import accounts properly. If you need an import process that handles duplicate reference numbers, please contact Sales.
The import process is for simple imports of debtor accounts. It does not update existing accounts, cannot import all CollectMax data fields, cannot import multiple claim accounts and cannot be used to import more complex file formats. Please contact Sales for information on custom import processes for these type situations.
A new template should be created for each new format file you receive. Once you create a template it will be available for use multiple times until you remove it. If the file you are attempting to import is in the same format as a template that has already been created, there is no need to create a new template.
To create a template, you must have an import file. The AIM Interface needs the import file to set the columns that must be defined. It is recommended to use the actual data file to create the template so the formatting options are set correctly. Blank Files may not show proper formatting and result in poor import results.
From the Main Screen of CollectMax, click
the button to display the Network Processes Screen.
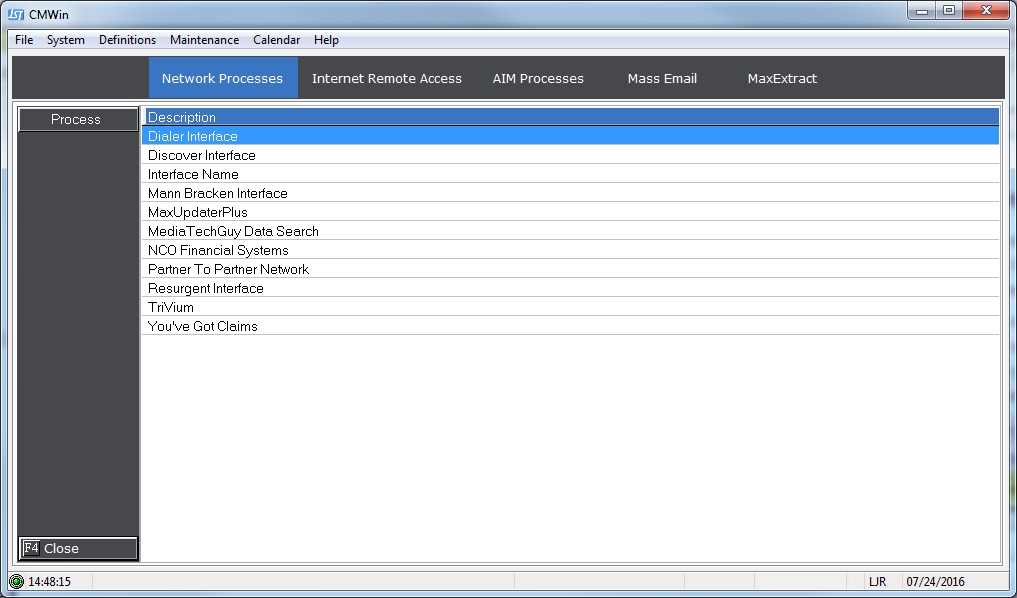
Click the  tab to display
the AIM Process Screen.
tab to display
the AIM Process Screen.
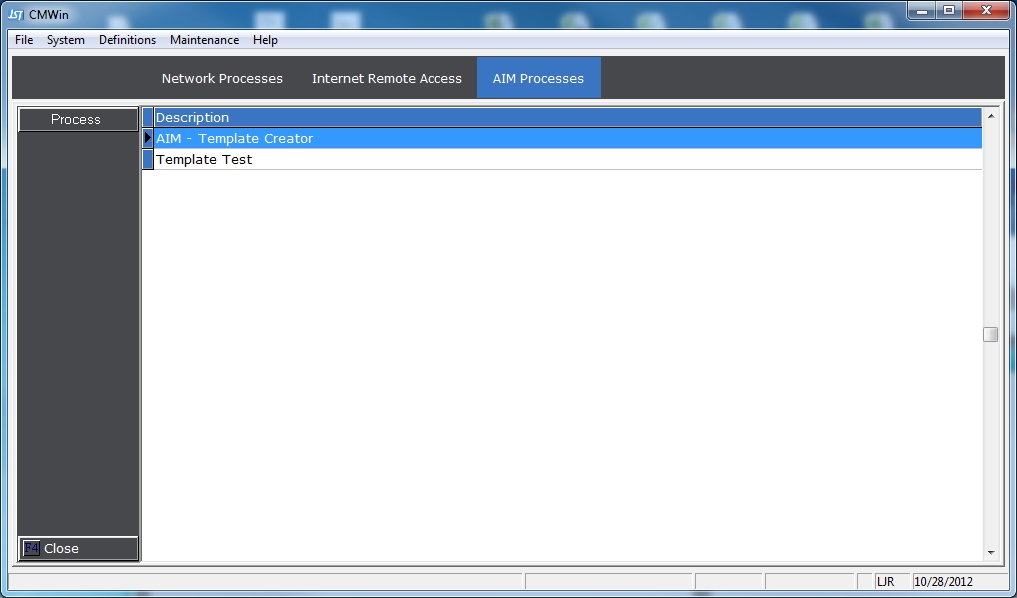
Select the AIM – Template Creator entry and
double click or click the  button
to display the AIM – Template Creator Screen.
button
to display the AIM – Template Creator Screen.
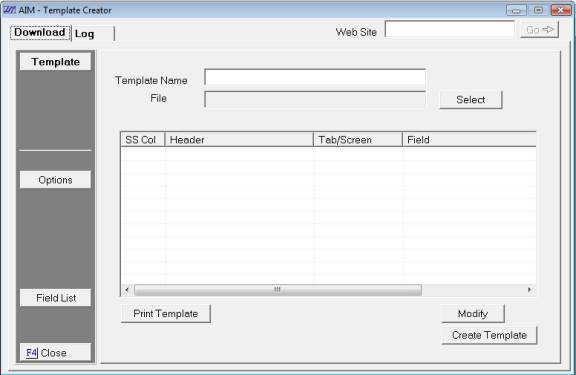
Start by selecting the Template Options:
Click the ![]() button
to display the Options Screen.
button
to display the Options Screen.
Select the appropriate options from the following
list. Click the ![]() box next to the proper selections
for this data file.
box next to the proper selections
for this data file.
After all the options have been set, click
the ![]() button to display the Template Definition Screen.
button to display the Template Definition Screen.
Enter a Template Name. Your name should reflect something that would allow users to know what files this template should be used to import.
Select the file to be imported. Click
the ![]() button and browse to find the import file to
be defined.
button and browse to find the import file to
be defined.
The File Columns plus the first line of data or header will be displayed in the grid.
Each column of data will have to be translated into the proper CollectMax field. The data in the column will be imported into the selected CollectMax field.
Click the first column you would like to
translate. Click the ![]() button to display the definition
screen.
button to display the definition
screen.
Select from the ![]() list
the Tab/Screen that this column of data will appear when imported to CollectMax.
This selection is used to narrow down the selection fields for faster
template creation.
list
the Tab/Screen that this column of data will appear when imported to CollectMax.
This selection is used to narrow down the selection fields for faster
template creation.
For example: If your column lists the Reference Number, you would need to select Claim for the Tab/Screen selection.
You may also click to Show All and all available fields will be shown in the fields list. The Tab/Screens available for selection are:
Bank – Primary Debtor’s Bank Information
Claim – Account Balances and Fields
on the Claim Tab
Co-Debtor – Secondary Debtor Fields
Co-Employer – Secondary Debtor’s Employer
Fields
Debtor – Debtor Fields
Employer – Debtor’s Employer Fields
Filing – Filing Information
History – For Fields that can go in
Account History
Judgment – Judgment Fields
Plaintiff – Plaintiff Fields
Show All – All available Fields
Skip – For Column that should be Skipped
and not Downloaded
Summary – Fields available on the
Summary Tab
UV – User Fields
Next, select the proper field from the ![]() list. If the field is not listed, try selecting
another tab or Show All to find the field you need.
list. If the field is not listed, try selecting
another tab or Show All to find the field you need.
Once the column has been translated, click
the ![]() button to display the template screen and grid
again.
button to display the template screen and grid
again.
Continue to translate each column until the entire file has been completed. If a column is not defined, the process will consider that column as one that should be skipped and that data will not be downloaded. Be sure all import columns are translated prior to importing accounts.
After all Columns have been defined and Options
set, click the ![]() button on the Template Screen. The new
Template will be created on the main screen of the AIM Interface.
button on the Template Screen. The new
Template will be created on the main screen of the AIM Interface.
From the Main Menu of CollectMax, click the button to display the Network Process Screen.
Select the tab.
Select the Template to be used for the import process and double click
or click the button. The Template Download
Screen will be displayed.

To review the template for accuracy, click
the ![]() button.
button.
To review the options for accuracy, click
the ![]() button.
button.
While reviewing the Template or Options, modifications can be made to both. If multiple modifications should be made, you can remove this template and create a new template.
Client Translation Table
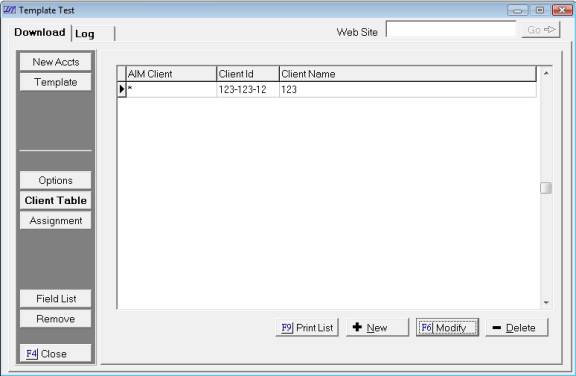
The Client Translation Table must be configured
so that the accounts are imported to the proper clients. If the
accounts should all be attached to a single client, click the ![]() button to display the Translation Screen.
button to display the Translation Screen.
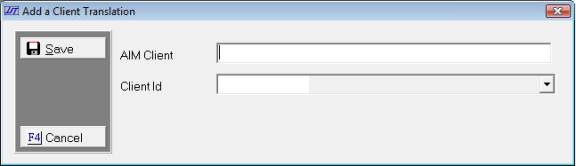
In the AIM Client field, enter a * . In the Client ID field, select the proper CollectMax Client.
If the accounts should be attached to multiple client accounts, enter the client translations based on the selected translation column in Options. The AIM Client should be the data in the selected translation column. Only one entry per translation is needed. You should only need to define each client code once. Once it is defined it will remain defined for subsequent downloads using this template.
Click the ![]() button to select
the Download Settings. All download settings are optional except
for status code. A status code must be selected to successfully
import the accounts.
button to select
the Download Settings. All download settings are optional except
for status code. A status code must be selected to successfully
import the accounts.
Click the ![]() button and select
the file to be imported.
button and select
the file to be imported.
Click the ![]() button and select
to process the import report to Screen, Printer or File. The
preview process will begin.
button and select
to process the import report to Screen, Printer or File. The
preview process will begin.
If there is problem with the file or the translations an error should be displayed indicating the problem. Try correcting the error in the file, template or client translation table. If you are unable to figure out the problem or need help in correcting the issue, contact Technical Support.
Possible Errors in Importing:
Excel Open – Excel must be closed
to import an excel file
No Client Translations – Check the
Client Table
Selecting to import a column with words
into numeric field – Check the translation on the indicated problem
fields
Date Formatting – Check all the columns
that are importing into a date field and make sure your options are set
to the proper date format.
Currency Formatting – Make sure your
balance columns are not formatted as currency.
Formulas – Make sure that all the
data in the columns is actual flat data and not a formula result.
There are methods to taking a formula field and flattening it to the result.
Formula cannot be imported into a numeric field.
If no error is displayed a preview report will be displayed to screen, printed to the printer or saved as a file per your process selection. Once that has been reviewed for problems, select to finalize the import process by importing the accounts.

A final report will be displayed, printed or saved to file per your process selection. The accounts will now be available in the debtor find form.
Please review a couple of imported accounts for accuracy. If the import was incorrect, please delete the imported files. Correct the template and re-import.
The AIM Interface will allow you to print a complete list of available download fields for your or your client’s reference.
From the Template Creator Screen or the Template
Download Screen, click the ![]() button
and a report will be generated to screen. From
there you can export or print the report.
button
and a report will be generated to screen. From
there you can export or print the report.
From the AIM Processes Screen, select the
template to be removed and double click or click the button.
On the download tab, click the ![]() button and follow the
prompts to completely remove the template. Once removed you will
not be able to restore this template. Make sure that this
template is no longer needed prior to removing it.
button and follow the
prompts to completely remove the template. Once removed you will
not be able to restore this template. Make sure that this
template is no longer needed prior to removing it.